

The pieces of Serengeti come together to create this amazing tray. This collection not only has new printed pieces, but is is filled with texture and dimension. Adding the textured papers with the line offers so many new directions to take your 7gypsies inspired projects.
 |
| This photo added to the Serengeti inspiration, fount on Pinterest. |
We created Serengeti with a wide assortment of eclectic findings to help you tell the perfect story. In this collection you'll find glimpses of the Nile, Sahara, Egypt, South Africa, the animal kingdom, and more! Wether it be a safari-themed birthday, first trip to the zoo, a trip to Disney's Animal Kingdom, or a mission trip to Uganda, this collection has the findings to preserve your memories.
12x12 2-sided papers
We wanted a neutral palette that brought the true essence of Africa to life. We also are loving neutral vintage backgrounds that mix and match with amazing vintage images. Each paper was named with a translated Swahili word, one of Africana's most used languages.
Vitabo (books)

Pica (photos)

Maua (flowers)

Wanyama (animals)

Mihuri (stamps)

Mabango (posters)

Paper Pads
The papers are also available in both 6x6 and 8x8 pads offering scaled down versions of these beautiful papers. Each pad features all 6 styles, 2-sided with a total of 48 pieces.

+8x8+2-Sided+Papers+Serengeti.jpg)

The scaled down versions are ideal for 7gypsies trays and smaller projects.
Serengeti Mini Ephemera
The colorful nation is captured in the Serengeti mini ephemera found as one travels the lands of Africa. 15 unique colorful designs.


The mini ephemera sits perfect onto of the misted zebra paper to create pieces that look like they have been around for so very long!!!! Note* The zebra paper is also available in 12x12 under our textured papers. It comes black and white…you have to add the mist or paint to make it your own.
Serengeti Vintage Photo Pack
Photos that capture what a gypsy might see on travels through Africa and want to share with the world. 12 unique photos featuring vintage animals, safari and other native images. Mix and match them with your photos to bring a vintage vibe with your photos that are new and old. - we love the one of the lady on the zebra….we so want to ride a zebra.

Serengeti b & w Art Tags
The essence of the cultures of Africa are abound in our newest creation, b&w art tags. Prepared with stamp-like art that is ready to be tinted, painted and added to your creations. 17 different designs.


Misting the b&w tags with Tattered Angels Glimmer Mist is a great way to create tags and ephemera in your colors, allowing your piece of art to be your own.
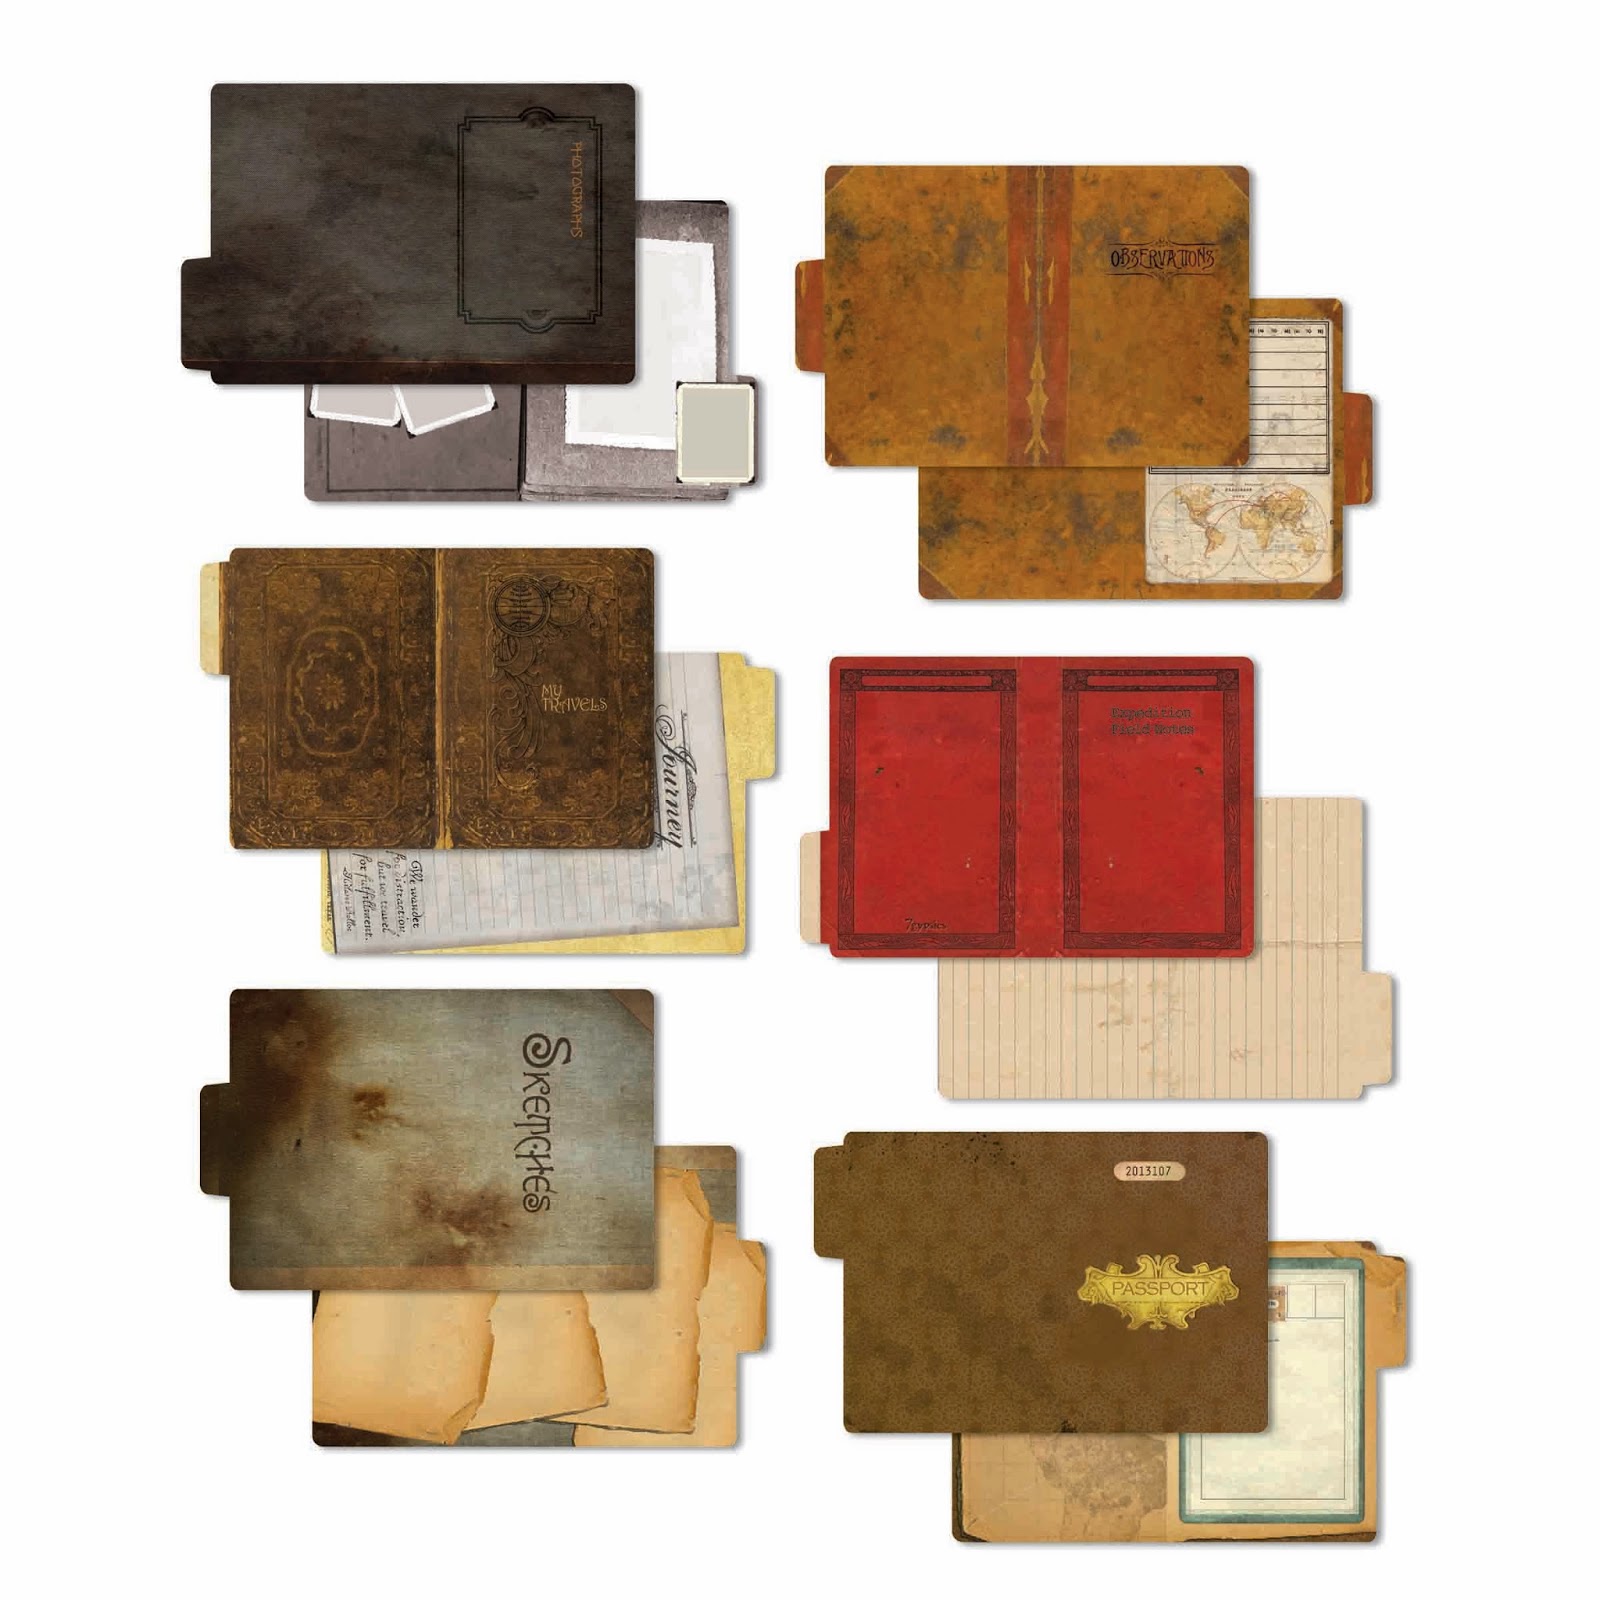
ATC Printed Serengeti File Folders
The amazing artwork of the line can be found inside and out of these new printed file folders. Perfectly sized to hold the standard ATC cards, they will bring fun life to your projects. Unique designs are printed on both sides - 6 different styles per pack.
+Printed+ATC+File+Folders+Serengeti.jpg)

The file folders are perfect in layouts, mixed media book or to house your favorite vintage ATC Project. Use our vintage pins to pin two together making a mini book of ATC File Folders.
4x6 Printed File Folders
Another new product, 4x6 Printed File Folders. Now a vintage place to hold and organize the hundreds of photos. The designs on the 4x6 are not specific to the Serengeti line, but they work wonderfully with them. 6 different styles, printed inside and out.

We love this banner created with the 4x6 file folders. Add photos, ephemera and sketches for all to see. Jennie created this to hang in her boys room.
Gypsy Book: Canvas, Burlap, Drab & Pyramid
These sewn book are the perfect surface to capture your Serengeti journey. Featuring 4 pages with space on the front and back for design in 4"x6" format. If you have not designed on fabric before this is the prefect place to try it out. The diversity of working with fabric is so fun, giving you amazing new design options. Here are just two of the book options, we have 4 fun combinations, including one with burlap.


Gypsy books can be used vertical or horizontal and are filled with pages of fabric that are ready for great design. Add layers of ephemera, textured papers and metal embellishments to create this amazing front cover. Now you can just pin your vintage pins right to your project.
12x12 Texture Papers
Another new collection from 7gypsies. Textured papers and fabric are so hot right now, we wanted a collection of our own to match the Serengeti line. Here are just a few of the designs…burlap, linen, leathers, animal prints….ready for so many great techniques…stamping, stitching, distressing….

Use the textured papers as is or ink, mist or paint them to create colorful African inspired prints. Keep the artwork vintage and neutral or add as much color as you would like. The spear was crated with the Tattered Angels Naturally Aged Kit - Tarnished Silver.
Mist System
Four unique mists that bring out our favorite colors of the Serengeti line--two opaque and two sheer. We left the glimmer out of the paints selected leaving a pure, natural color for this line.

Is this collection worth dreaming up a trip to Africa? We sure think so!
To order, contact your favorite retailer. For existing wholesale accounts, please contact Canvas Corp directly. For new wholesale accounts, please fill out the following form.


+Large+Ephemera+Maritime.png)
+Mini+Ephemera+Maritime.png)
+Journal+Pages+5x7+Maritime.png)
+Journal+Cards+3x5+Maritime.png)
+6x6+2+Sided+Paper+Maritime.png)


