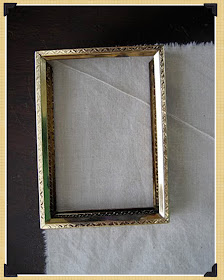
Section #8 - Debbie Crouse
What great fun to be able to do a project with the entire 7g design team. We have the best design team and it is great working with these talented ladies.
This is mine, section #8 -
Materials: (all 7gypsies)
Paris tissue paper
ATC Tag Kit: Affirmations (#8, tag with stamp image)
(1) princesca dangle
(1) mini key
(1) apothecary bottle - thinner bottle
Metal Charms Fortune (remove the wing and set aside for section #9)
Other:
chipboard (or 7G packaging)
tiny frame (2.5"x3.5")
page from old book
fabric (3"x5" - any color, will not show in project)
adhesive
mini tag (1/2"x1" - can create from scrap paper)
seam binding ribbon (or string)
antique brass chain (or string or ribbon)
Project tips:
- you can substitute the 7gypsies packaging in the kit for any of the chipboard/book board needed. be very careful when opening the packaging if you would like to use it.
- keep ALL your paper scraps from each section, you will need them for section #11
- you can use scissors in place of all punches
- you can use the purple ribbon in the ATC Photo Display kit in place of any string and wire
Instructions:
2. Cut a piece of heavy chipboard the size of your frame using your frame as a template.
3. Cover the chipboard piece with a page from an old book. Ink edges.
4. Cut a piece of fabric slightly larger than your frame. Add 1/2" in height (this is to turn under in step #5).
5. Turn under fabric 1/2" on one end and glue with glue stick.
7. Attach fabric to chipboard piece with folded edge on bottom. Do not glue folded bottom edge (this is where the wire arm on the receipt holder will be inserted). Trim any excess on edges.
8. Drill tiny holes in top of frame. This is where you will wire the chain and dangles to frame.
9. *Please note: This photo is showing the back side of frame. On fabric side of the chipboard piece, run bead of glue around 3 edges (Do not glue the folded fabric edge). Slip into frame and press so it attaches to back of frame. The open edge of the fabric is where you will slip the clip under neath fabric to attach to ATC receipt holder.
10. The label for bottle is cut from 7g "Paris" collage tissue. Gently glue to bottle and tie tiny tag to bottle neck. Screw mini eye hook into bottle cork.
11. Add "fly" word to wings charm and attach to crystal drop.
12. Attach bottle and wings charm to ends of chain and wire to frame as shown. Tie narrow ribbon on both dangles.
13. Postage stamp is cut from 7g tag and glued to background.
14. Cut a circle piece from bookboard to fit "8" piece and attach to frame.
That's it....really pretty simple!
a little about me...
I have been with 7gypsies since Donna and Steve Smylie started the company and feel lucky that I have been able to be a part of their journey. I am over the fabulously talented 7gypsies design team and also planning and decorating the 7gypsies booth at CHA shows. You can find out more about me on my blog - "One Lucky Day" that I share with Paula Cheney (also on 7g design team) at www.2gypsygirls.com. Paula and I have had the opportunity to travel around the world teaching classes that show off our favorite 7gypsies products. The best part of that is that we have been able to meet lots of fun and interesting people along the way.
blog that inspires me... I am loving Janet Hopkins blog. We have known each other for years and I hadn't been to her blog in awhile and recently checked it out because we found out we had done similar posts on each of our blogs on almost the same day. She is fabulous and always has great inspiration!
Join Ranjini Malhotra Thursday for section #9. Other items you will need are:
Seam binding ribbon (8") or string
Glitter
White acrylic paint


dernLove this little treasure, Gorgeous tutorial. Thanks
ReplyDeletethank you fairyrocks!!!
ReplyDelete