Menu

Showing posts with label global. Show all posts

Saturday, May 5, 2012

this month: may


may...
"Rough winds do shake the darling buds of May, and summer's lease hath all too short a date." ~ william shakespeare


our may picks: 1. library drawer 2. keys tissue paper 3. white surveyor rulers 4. britannia book knob 5. Lille tags 6. crystal dangles  7. global 6x6 paper pack

Don't forget to join us or become a follower of our blog to stay current on all things gypsy.

Tuesday, January 10, 2012

spotted & hearted: stationery & envelopes

our gypsy caravan has been busy traveling and we just had to share some of the fabulous stationery sets, envelopes and notepads we are seeing everywhere we go! 
these days with technology, it's sometimes hard to see why we would need paper and pencils, but sometimes, picking up that old ink pen, writing a little love note, thank you, congratulations or a simple hello, is just what's needed to make someone's day just a bit more special.
 how about the simple monogram sets or the use of photos and paper to create a vintage polaroid look? very gypsy...
 know someone that loves to write sweet nothings (or wish wrote more sweet nothings) or likes create homemade cards?
this sectioned wood trinket box is a perfect match for a complete stationery set. 
take a peek at the tiny envelopes, packages and notes? such a cute little creation!
 place a simple note on the front, vintage style wedding invitations wrapped in string or a little set with all the necessaries.
what gypsy doesn't love a 1920's-monopoly man-makes-me-giggle mustache? 
 how about grabbing some of our Global collection papers and creating your own map paper envelopes? 
 burlap envelopes? we think those are pretty spectacular....

Friday, December 16, 2011

facebook friday: Zuzu's Petals Altered Art 'n' Stuff


Congratulations
 Zuzu's Petals Art 'n' Stuff
your GORGEOUS map project is our 
Facebook Friday pick this week!

Saturday, October 1, 2011

from the studio of: paula cheney

shadowboxes
by paula cheney

I love shadowboxes and over the years I have made so many different kinds that I thought I might share a few with you along with some tips on creating them.

1.  Think three-dimensional: look for items that will fit within the depth of the box to enhance your theme.  Frames, bottles, small toys, wood type numbers or letters, wood blocks, paint brushes, natural elements such as seed pods, nests or twine. 

In the example below I created a shadowbox from the lid of a computer paper box.  I added dividers cut from old boxes, then used natural elements to fill each space.

A vintage frame with silhouettes from the Victoriana rubbing, a seashell, a bottle with Gypsy Hardware Kit (Natural History rubbing), a nest with gathered seed pods.

Gypsy Hardware metal oval (Victoriana rubbing), and other natural elements.  The "roses" in the center berry basket are a type of pine cone that opens to look like a rose.  I came across them in a local junk store. 

Some old moss from the craft store, and a few sea shells.  I don't know if you can see it but I even put a sea shell rubbing in the very back of the berry basket.

The bird was mounted on chipboard and cutout to create a pop out shape while the nests remain in the background.

Gypsy Hardware (Natural History rubbing) with a hanging acorn.  I used a Dremel tool to create the hole in the acorn for the wire then hung the entire piece on a broken branch.

2.  Background:
paper - Adhere patterned paper to the background that will not compete with items chosen to showcase.  I find it easier to decide on the items I want to use, then choose the background.
cork - use pins to secure items
fabric - If you don’t want to add fabric directly to the box, cut a piece of foam core a bit smaller than the back then add the fabric to the foam core.  Remember to cut the fabric a least an inch larger than the foam core so that it can be wrapped around the edge to the back side.

In the example below I was working with the 7gypsies wooden library drawer so I adhered the cotton canvas right to the drawer.  The picture was mounted on chipboard, then foam tape to raise it off the canvas background before adding all the clocks that I had previously cut from Paddington paper.

Once you've decided on a background, experiment with arranging your chosen objects.   To create a three-dimensional effect, layer items on top of each other or use pop dots for depth. When you've settled on a pleasing final arrangement, attach your items to the background and ledge.

3. Hidden Meaning:
In the example below I used the Australia map from the Global paper line to represent a trip taken.  I knew I wanted to use the Apothecary bottles on the ledge and starting thinking of what to fill them with.  I like hidden meanings in my work so everything here has a purpose.  The clear bottle has a blue colored rubbing that says "healing salve".  I picked this to represent the feeling of the journey to Australia...it was a healing salve to my soul.  The feather was gathered at the Sydney harbor.  The amber bottle with the number 16 represents the number of days in the journey and each little strip of paper in the small bottle has a name of someone we met on our journey that we wanted to stay in touch with, hence the stamp (Lille paper tape) on the outside of the bottle.

 The tack nails were placed for each city we visited (7gypsies alphabet clear stamp) and then 2 lengths of red wool embroidery string was stretched from city to city representing two people in love, on one journey together.

Lastly, I added the train tickets behind the bottles and the 09 to represent the year the trip was taken.

So hopefully you can see that a shadowbox can be made from most anything (even cardboard), it can have exciting patterns or quite canvas for a background and it can hold hidden meaning that only you can reveal to the unsuspecting viewer.

cheers!
paula cheney


Tuesday, September 6, 2011

from the studio of: ann mabee

book board village
by ann mabee


We were tickled when 7gypsies artist Ann Mabee agreed to share her inspiration behind the amazing village she recently created using the new Off the Wall and Global papers!  
Here's what she had to say:


This past June as the gypsies were preparing for CHA summer, we artists were asked to come up with some inspirational projects using the products from the new release.  We were asked to come up with projects that went beyond what we’d done in the past and ones that were unique and diverse.  They were looking for several home decor ideas or things that weren’t the typical scrapbook or papercrafting projects.  Lots of suggestions were given and one struck a chord in me as soon as I saw it.  The suggestion was a global village.  A couple of years ago I made a house for another 7gypsies trade show release, but it was larger and had to be made to collapse for ease in transporting to the shows!  And on that one, the roof came off and housed an album about my oldest granddaughter.  So I knew I could build the structures.

I have always admired and been inspired by Julie Van Oosten’s work and I often go to her online gallery to just admire her many creations.  I have always loved her little houses and house projects.  So my first idea was to do something with the new Global papers in a village type setting.  But when I saw the Off the Wall papers, my mind spun in a whole new direction.  As a kid, I LOVED black Converse high top tennis shoes.  And even now three of my granddaughters live in their own black Converse high top tennis shoes!  They are timeless to me.  I knew I had to use that paper on the front of a house.  So that was the first one I created.  It’s an asymetrical building, so I could accommodate the shoes.  And when I saw the zippers, I knew that had to be incorporated, as well.  They just went together in my mind.  The rest of the buildings just took off from there.  Each and every one of them has a personal meaning for me and you can add your own personal touch to make your village truly your own.  Of course there are seven buildings in the set...just had to be one for each of the gypsies!  Once I got started, it was easy to find just the perfect 7gypsies embellishment to add just the right touch to make each house unique, but cohesive.  When I sent my village in to gypsy headquarters, I joked with my sister gypsy, Debbie, that I should have earned an engineering degree or something for all it took to design and construct seven buildings!!


I was tickled when I watched the 7gypsies webinar that was shown to retailers just prior to CHA summer this year.  There were several comments from store owners asking if the village was going to be a new kit!  I never thought I would build another village, but when my local scrapbook store saw the project and learned that I was the one who made it, they asked me to teach a class there.  Crazily, I agreed!  So I’ve recreated the village using all Off the Wall Papers in preparation for a class in the near future.  Now the hard work comes....cutting the bookboard and kitting the class.   The fun part is putting it all together, so I hope that the class participants will get to miss the hard work and just have the pleasure to creating their own little village to sit on a shelf or a table in their own homes.  I am planning on using mine and changing the decor around the village to coincide with the seasons/holidays.


I have a blog that I am constantly behind on updating, but it’s more of a personal journal than one that I use to showcase things I’ve created.  I think that’s because I don’t think what I do is all that great for people to fuss over or for me to toot my own horn about.  I do what I do because I enjoy it and because it gives me a creative outlet to express myself and to relieve stress.  My greatest joys in life are my family...my recently retired husband, my three children and their spouses, my 10 (soon to be 11) grandkids and my siblings.  And when any of the grandkids ask to come over to make a craft project or to create a scrapbook of an event in their life, I am thrilled beyond measure to accommodate their request.  It’s mostly my granddaughters who want to be creative, but I’ve made books about my grandsons and they are sheepishly happy as can be to see themselves on paper and highlighted in an album or a book!

You can see more of Ann Mabee's work by clicking HERE.  For more information about her class you can email Ann by clicking HERE.

We'll be posting a DIY tutorial for how to assemble your own bookboard house on Thursday so make sure you stop by and check it out!


Saturday, September 3, 2011

caught on film: CHAS arrivals part 1


Tuesday, August 30, 2011

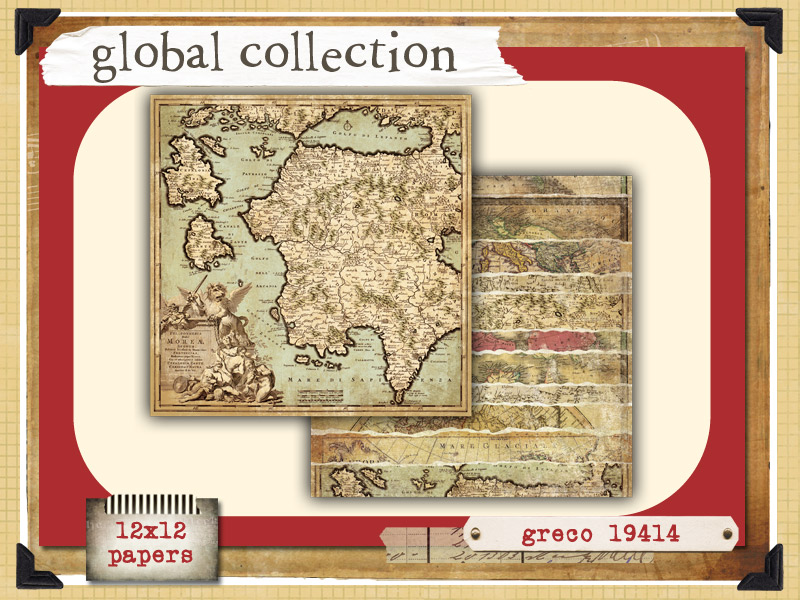
look what we got: global collection

Have you seen our new global collection?  
It's the latest in BRAND NEW products to arrive in our warehouse and is ready to ship now!
Maps are popping up everywhere~ decor, fashion, decoupage and all over our favorite craft inspiration sites.  We're even seeing large scale maps framed and sold as wall decor! 
(check out the latest Restoration Hardware catalog)
We've long been inspired by old maps and charts.  They represent a sense of adventure and exploration of places we've been or long to visit.  Some tell stories of places that have changed with time.
Our inspiration for global was drawn from our own collection of maps and charts.   We reconstructed parts of each to create this line of papers. 

Many of the papers are centered around places of meaning for us including the birthplace of our founders.

You'll find that most of these papers have a warm, vintage palette of colors.  

We also think the Global collection coordinates beautifully with our CAMDEN collection and have been playing with combinations from both paper lines on our projects.
Have you seen the fun Globe paperchain?  
It's featured in our last post as a DIY project!
The papers come in 12x12, 8x8 and 6x6 sizes.  You'll LOVE seeing these maps in the mini 6x6... so cute!
A FABULOUS chipboard alphabet covered with a map overlay! 
And some pretty art tags.  We can't wait to use these on gifts and in the Artist Printers Tray.  Maybe even a mini tag book?
And we've saved our FAVORITE for last: the new Global papertape.  It is so GOOD~ we can't wait to start using it on everything.  
(we'll have to wait just a bit longer~ it's the only global collection element not shipping now~ but will be here soon!)