
Section #4 - Kerry Lynn Yeary

(4") Venice gaffer tape
(1) Display trim pyramid stud
(4 - 1" circles) Paris collage tissue
Paddington chipboard Alpha
Affirmations tag kit (#4)
(1) Crystal dangle
Metal Charms fortune (crown removed in section #3)

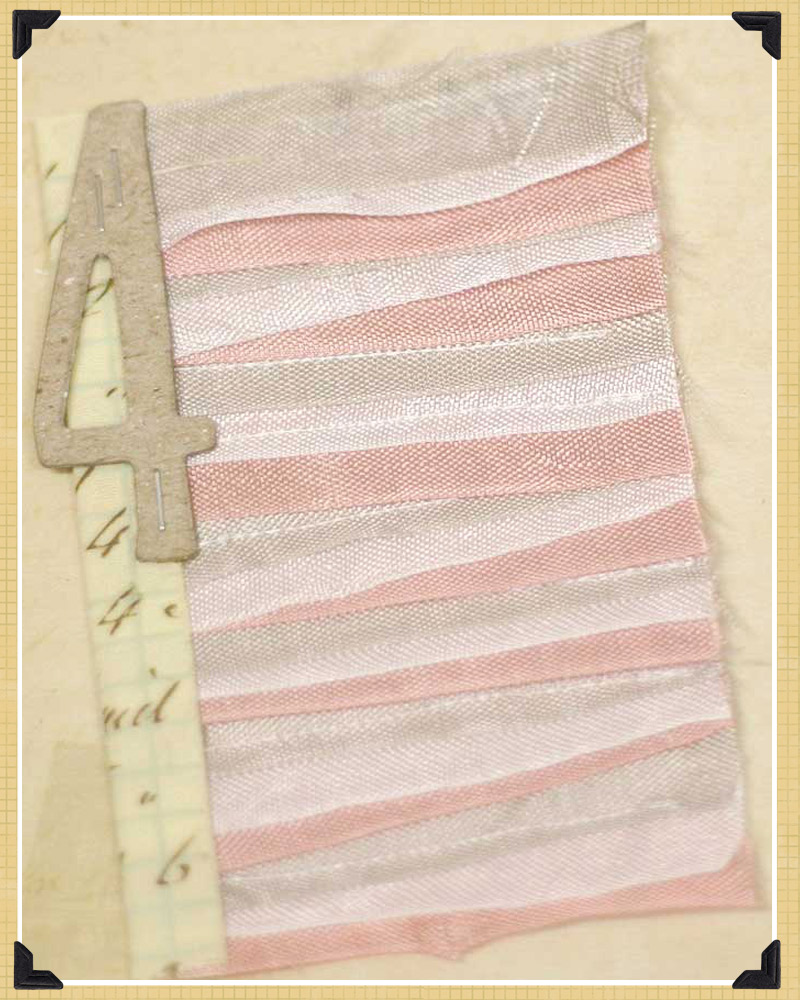
Seam binding (12"ea. - pink, gray, very light pink)
(1) Vintage millinery leaf
Soft Pink glass glitter (or any color you prefer)
bronze mini eyelets
jump rings
scrap piece of cardstock or chipboard or 7G packaging
Tools:
scissors
2" circle punch (or scissors)
liquid adhesive {i use zip-dry}
glossy accents
crop-a-dile (or scissors to punch small hole)
tim holtz mini attacher (or stapler)
sewing machine
gel medium (golden or modge podge)
Project tips:
- you can substitute the 7gypsies packaging in the kit for any of the chipboard/book board needed. be very careful when opening the packaging if you would like to use it.
- keep ALL your paper scraps from each section, you will need them for section #11
- you can use scissors in place of all punches
- you can use the purple ribbon in the ATC Photo Display kit in place of any string and wire
Instructions:

tip: make sure to sew down the center of each row so the edge that isn't tucked under can float free, which creates a beautiful texture when finished. trim threads and any extra ribbon ends.


tip: i like to do the final layer with the gel medium as it really locks the glitter into place and creates a subtle sheen and flat layer to the glittered piece.
5. cut other 2" circles with punch and create other pie chart pieces. i created sections with :
* gaffer tape
* vintage millinery leaf {cut & round outside edge with scissors}
* vintage ledger paper
* layered paris tissue paper {ruffle up edges & attach with mini stapler}

7. add center "4" circle to top with liquid adhesive.
8. punch top & bottom edge of pie chart with crop-a-dile and set your eyelets. add charm crystal dangle to top and crown charm to bottom.

a little bit about me: I live in beautiful sonoma county, california with my husband and two children who we affectionately call "the littles". i've been lucky enough to be on the 7gypsies team for almost two years. i love french linen, tatted lace ribbons, old chippy salvaged wood and all things industrial metal. come visit me at kenner road, where i wax poetic about my daily life, shopping the alameda flea market and share pretty projects made with my own two hands.
inspiring blog: http://mamiejanes.blogspot.com/
I have been following jane's blog for a few months now and know that all of you gypsy's will love watching her turn old junk into amazing new creations.
Join Paula Cheney Thursday for section #5. Other items you will need are:
wire (or purple ribbon from gypsy tag kit)
string
glitter
ribbon
cream acrylic paint
toothpick
3 comments:
Love this.
thanks gina!!! we hope you are having loads of fun with this project :)
KL is pretty much my hero!!!
Post a Comment