Menu

Showing posts with label from the studio of. Show all posts

Wednesday, July 11, 2012

from the studio of: sande krieger

postale book stand
by sande krieger

Travel journals are more than just pieces of art. They are taking some of your best memories and dressing them up in finery and putting them on display for all to see. The new 7gypsies book stand is perfect to doing just that. Displaying your memories in a fashionable way. My oldest son and I took a trip back East to look at grad schools. Ten years from now I want to be able to "keep" some of those bonding moments, funny experiences and terrific meals in my memory.

The "keep" title is from an old vintage label maker. The flower is made of cheesecloth.
The pocket is a piece of manilla folder that I stamped with alpha stamps, punch a hole with a 1" circle punch in top and stitched to another piece of manilla folder. Red and black stamped on manilla folder card stock is my favorite color palette. What ever leftover bits of card stock I have I'll stamp images on then use them throughout the book. (like the finger pointing)
Mini paper clips are perfect for attaching layers.
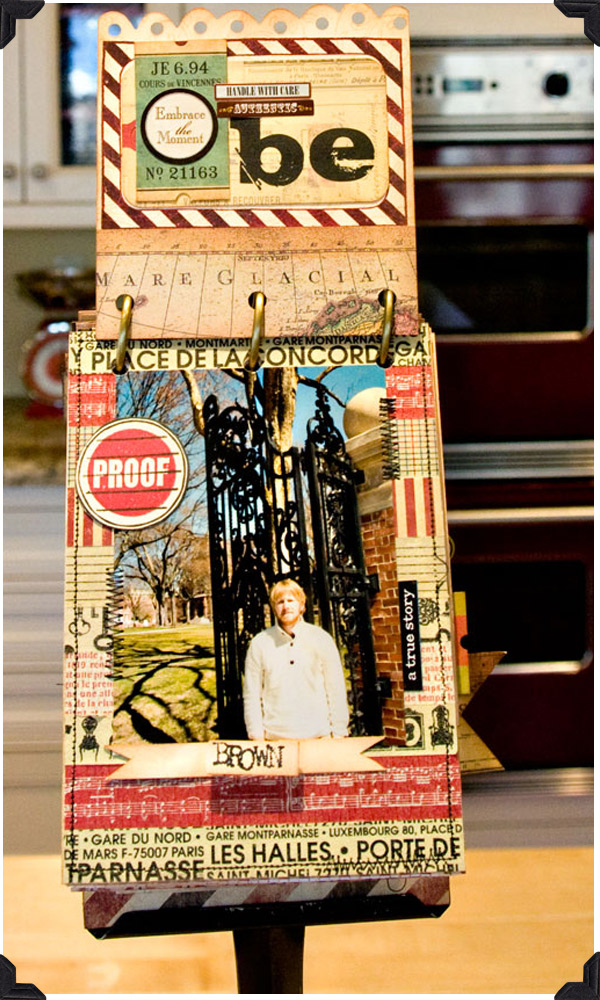
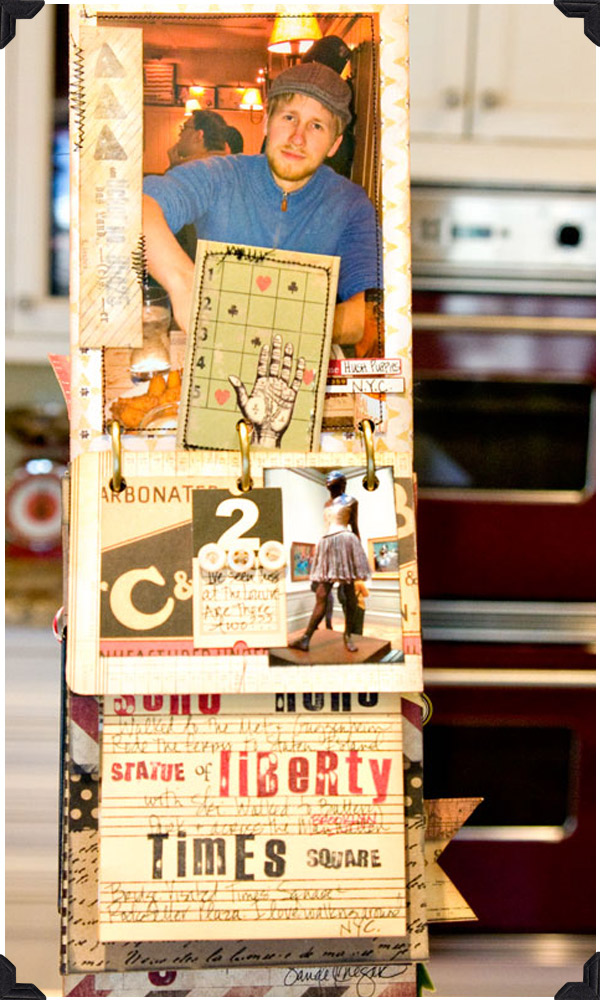
 I printed out several iphone photos that I had taken on the trip with a vintage white frame around them. I love using various sizes of photos throughout a book to add variety. 
The Postale line is perfect for journaling because so many of the papers already have lines on them. I did draw in additional lines whenever I needed more journaling spaces. Layering various size pages adds visual interest too.
Using both the letter stickers from the Postale collection and the rectangular letter stickers from the Postale sticker sheet gave the pages a little variety and was a change from all my handwriting and stamping.
 I also like to add in some dimensional items like the ribbon, pearls and velvet leaf so that the project doesn't look flat. I dug into my stash of older 7Gypsies products because I LOVE them so much. It really goes to show you how the new collection of Postale can work well with all the previous 7gypsies collections.

thanks for sharing your thoughts with us Sande!!!


Book Stand is shipping now!!

Tuesday, May 15, 2012

from the studio of: ranjini malhotra


postale library drawer
by ranjini malhotra

7 gypsies supplies:
Gaffer Tape - Nottinghill
Librarie Drawer with Index Cards
Librarie Drawer Naked Sidetabs
Paper Tape - Postale
Tag Envelopes - Postale
Tag Inserts - Postale
Index Envelopes - Postale
Index Cards - Postale
Petit Carnet - Rue/French
97% Complete Stickers - Always
Lille Paperclip Dangles
Avignon Paperclip Dangles
7 Gypsies Tags (Vintage & Victoria)

Other Supplies:
Mini Paris Envelopes (Zulio.com)
Paris Stickers  (Cavallini)
Trims: red seam binding, red/white baker's twine, blue/cream striped linen ribbon, red twine, eyelet lace trim (1.5")
Vintage Buttons
Photos, Ephemera, Index Tags

Postale Librarie Drawer
When I spied the Postale Collection from 7 Gypsies, I was so excited to be asked to create this project! I wanted to recreate the look of a cherished box of letters tied with ribbons, chock full of photos, ephemera, tickets, tags, memories, all tied up with pretty ribbons and buttons. The key for me was to work within the Postale palette. When you are pulling together supplies for this project, look for things you already have that will work with the palette - the addition of the vintage buttons, the trims etc. give an authentic feel to this project and is also visually pleasing. You'll love and cherish the finished project! 

Instructions
1. Use a Phillips screwdriver to unscrew the screws on the metal handle of the Librarie Drawer. Remove hardware and set aside. 
2. Cover the front of the librarie drawer with Nottinghill Gaffer Tape, trim to fit.
3. Replace the metal handle on the face of the drawer, the screws will pierce the gaffer tape as they are screwed back in. 
4. Assemble the drawer contents adding postale envelopes, inserts and photos. Journal on some of the inserts, you can adhere photos directly to the insert or envelopes and add journaling as well. Address the envelopes if you like, add vintage postage stamps. Use your imagination - you're creating a letter box full of memories! 
5. Add other ephemera from your stash - letters, tickets, tags. 
6. Tie mini postal envelopes with red and white baker's twine, securing the centers with a vintage button. 
7. For the very front portion of the drawer, layer the tag envelope shown on top of the postale index card shown. Use a circle punch to punch out a photo and center it within the circle on the tag envelope. Add the A sticker from the 97% Complete Stickers to the left side of the postale index card. Use a small circle punch to punch a half circle on the left side of the index card. 
8. I wanted the drawer to look as if it contained stacks of old letters and cards, tied together with ribbons. To imitate this look, you can stack journaling cards/envelopes/photos/ephemera of similar size and tie them together with ribbon as shown.  Repeat this several times to give the drawer fullness. 
9. Lots of little touches bring the drawer to life - add paper tape on the Naked Sidetabs, use paperclip dangles on the envelopes and inserts, fashion a rosette from fabric trim with a few stitches and a button for a center. The key is to add lots of color in the postale palette - look for the reds, whites and blues that make up the postale palette and bring those in through selecting trims and vintage embellishments in the same palette. 
10. You can add a petit carnet from 7gypsies in the back, mine was from a previous project and it fit nicely in the drawer for storage. 

Tuesday, April 10, 2012

from the studio of: ann mabee

postale mini library drawer
by ann mabee

when the gypsies gave me the assignment for CHA, it was to be a project using the mini library drawer and any of the new release products I wanted to use! talk about free reign!! i immediately went to my computer to see what I had pictures of that hadn't been used before and were of something I was wanting to document for myself. when I came to the file of the trip my husband and I took last summer to Oregon, I knew that that was what I wanted to use.
then I took a look at the new release and decided the Postale line would be perfect! it had an "all American" look to it and it would nicely compliment my pictures and our journey. i formatted my pictures to fit the mini library drawer and sent them off to be printed. then i went to work!
i knew it would take a lot of cards/pictures/stuff to fill the drawer. about the time i started this project, 7gypsies was acquired by Canvas Corp and the artists were given the opportunity to incorporate some of the Canvas Corp products into our projects. so I went in search to find some things to use.
i found several suitable items. their products are neutral tones and can easily be dyed to match whatever color palette you are using. so my project is a mix of 7gypsies and Canvas Corp. i put all of my supplies around me on my workspace so i could easily see what i had to use and went to work (it's that old gypsy thought...within arms reach!)
i wanted to do the project in a chronological order so one could see our trip from beginning to end. most of the items in the drawer are individual cards that help tell our story. i made a few mini books to tie together larger groups of pictures in a cohesive way. once i got started, the project came together easily. it was a fun way to document our trip to celebrate my husband's retirement.
thanks Ann for sharing your thoughts with us!!!

Thursday, February 23, 2012

guest post: Connie Fong!

Library Drawer Turned Shadow Box
- Connie Fong
A couple years ago, I found the posts for Deb and Paula’s Junk Drawer Advent Calendar, and I was hooked!  Deb and Paula are designers for 7gypsies and I’ve been following their blog (http://www.2gypsygirls.com/ever since.  I've been inspired by their many creative ideas.


So fast forward to last month when Deb asked me to create a project for the 7gypsies booth at CHA. I was full of emotions: happy, excited, nervous and scared. How fun it would be to receive a box full of 7gypsies product; but how nervous I was to create a project for them that would live up to their standards.


My assignment was to make a shadow box from the library drawer.  I felt that was doable and allowed me to focus in one area.


I have to share with you how I started the project. I layed out and sorted all the product on my kitchen table. I stared at it all day and then went to bed, not doing anything with the supplies yet, but just allowing the ideas to crystallize in my head.   In the middle of the night the ideas came to me and I got up and sketched this.
The sketch got me going and the next day I put it all together. It’s so much fun to be able to take an item and try to use it in a unique way, such as using the rulers as my dividers. 
Here's some close up shots. One of my favorite items are the apothecary bottles.
I was happy with how it came out and hoped they were, too. (we were SO happy!)


Visit Connie's blog for more fun! http://artfulplay.blogspot.com/